 EV INITIATIVE
EV Initiative / Building Admin · Property Manager · Charger Owner
Get your building ready.
Set up the locations you are responsible for, confirm the electricity recipient, and make resident charging understandable before residents need it.
1. Confirm your assigned sites
Your first sign-in
- Sign in to the v3 Admin address supplied by EVI with your assigned email.
- Open Overview → Dashboard and My Sites. Check the location names and charger identities against your building records.
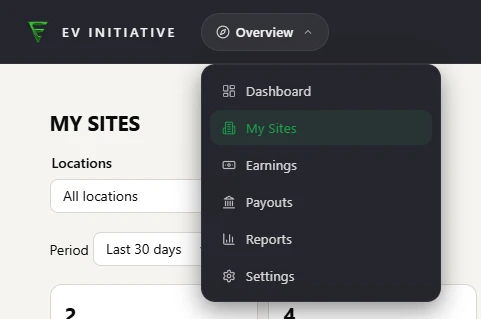
The Overview menu on a site account. Sample screen with test data. 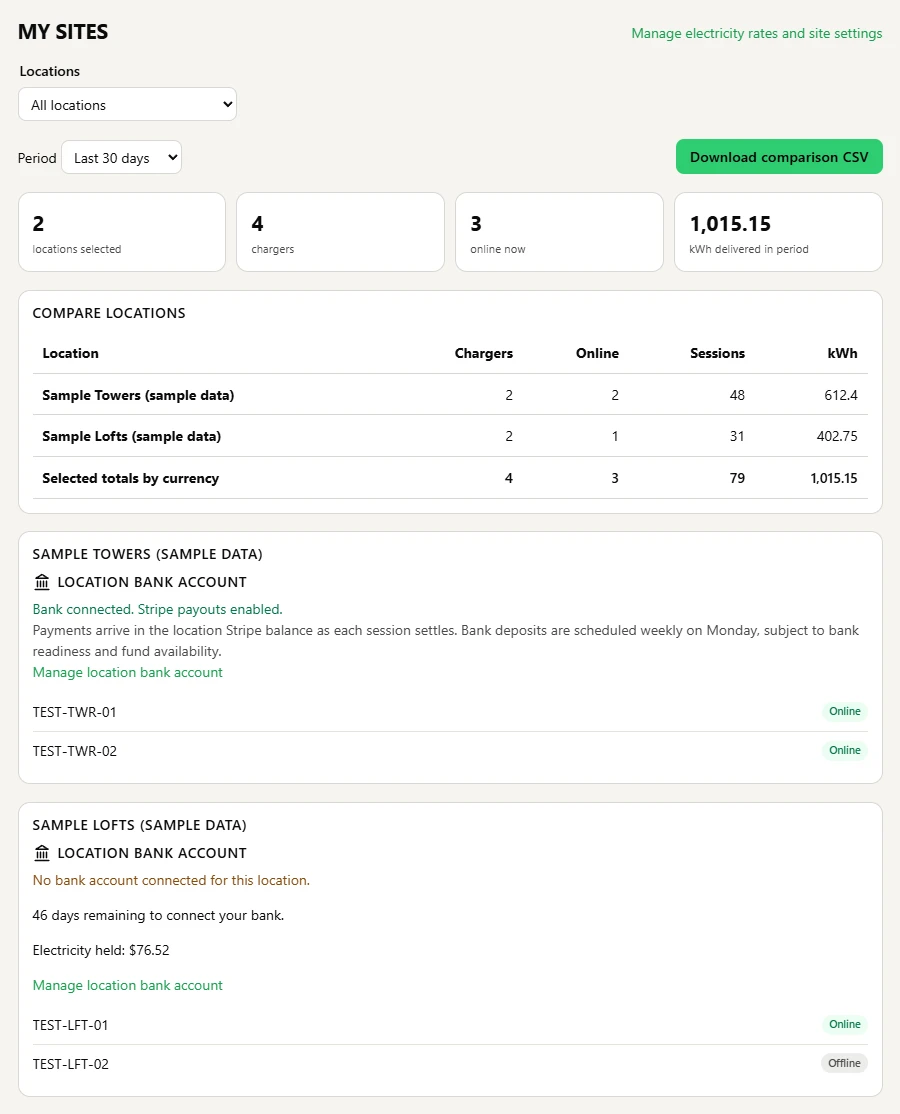
My Sites for two assigned locations, with each location’s chargers and bank status. Sample screen with test data. - If you manage several properties, select each one in turn. Ask the operator to fix missing or incorrect assignments before making changes.
Building Admin, Property Manager and Charger Owner site accounts share the site-focused menu. They do not automatically have the full operator console or authority to create users, change every tariff, issue fobs or launch a deployment.
2. Set electricity and resident access
One location at a time
- Open Overview → Settings and choose the location.
- Enter its electricity rate from the utility bill, including the applicable delivery and regulatory components. Check the displayed unit: per kWh or per hour. Save and confirm the saved state.
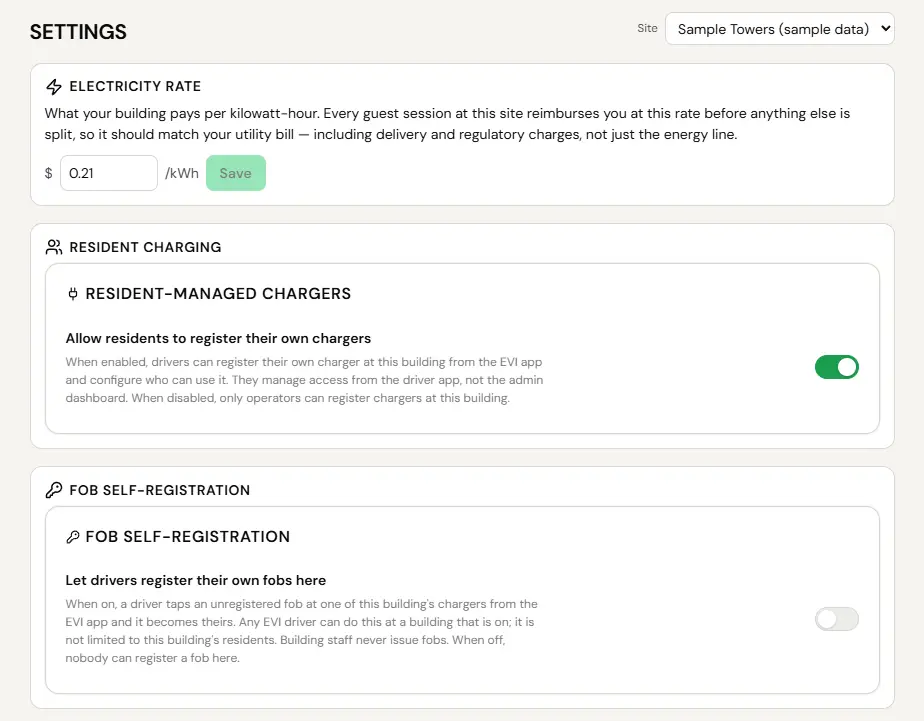
Overview → Settings for one location: the saved electricity rate, then Resident charging and Fob self-registration. Sample screen with test data. - Review Resident charging and enable resident-managed chargers only where the building has agreed to this arrangement.
- Review the resident fob-registration option, if applicable. This controls whether residents may register their own fobs; it does not give a site account a fob-issuing console.
If a rate is outside the field’s limit, ask EVI to review the tariff setup. Paid guest charging at a resident’s own plug is not available yet, so residents cannot open their plugs to paying guests. They can let neighbors and visitors charge free with the charger’s free pass list.
3. Connect the location’s bank
Set up the electricity recipient
- Open Overview → Settings and select the correct location.
- Find Location bank account. Confirm that you are authorized to manage that location’s bank account, choose its country if this is first-time setup, and review the payout terms.
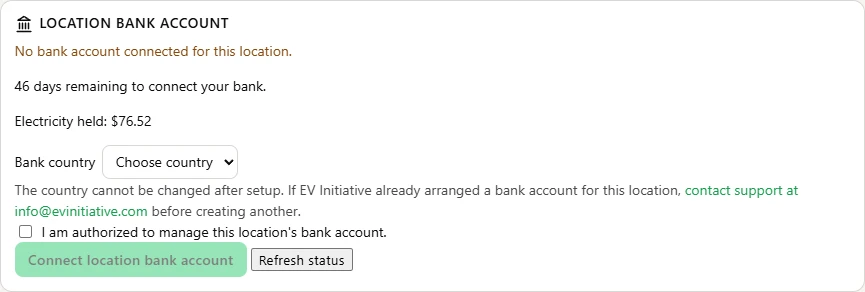
The bank card before setup, with the country selector and authorization box. It belongs to the location picked in the Site selector at the top of Settings. If you have not accepted the payout terms yet, ticking the box opens them first. Sample screen with test data. - Select Connect location bank account and complete the details requested by Stripe for the entity receiving that location’s electricity reimbursement.
- Return to Admin and select Refresh status. If verification is pending or information is due, tick the authorization box and use Review setup in Stripe to finish.
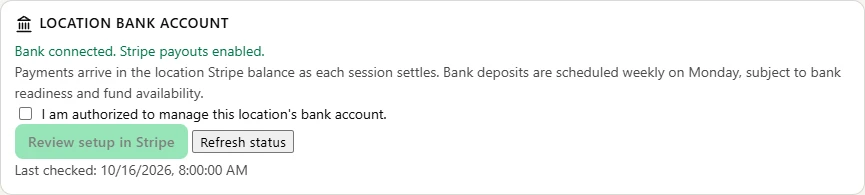
The same card once the location’s bank is connected. Review setup in Stripe is enabled once the authorization box is ticked. The last line shows when the status was last checked. Sample screen with test data.
The location bank account receives eligible electricity reimbursement, Site Share and legacy Revenue Share. Payments arrive in the location Stripe balance as each session settles. Bank deposits are scheduled weekly on Monday, subject to bank readiness and fund availability. The Site Host statement, below the bank card in Overview → Settings and in Overview → Payouts, lists each recorded transfer under Session transfers with its sessions, ledger currency, cash sent and conversion costs. A connected bank or recorded charging sales alone are not proof of payment.
4. Hand over the installed chargers
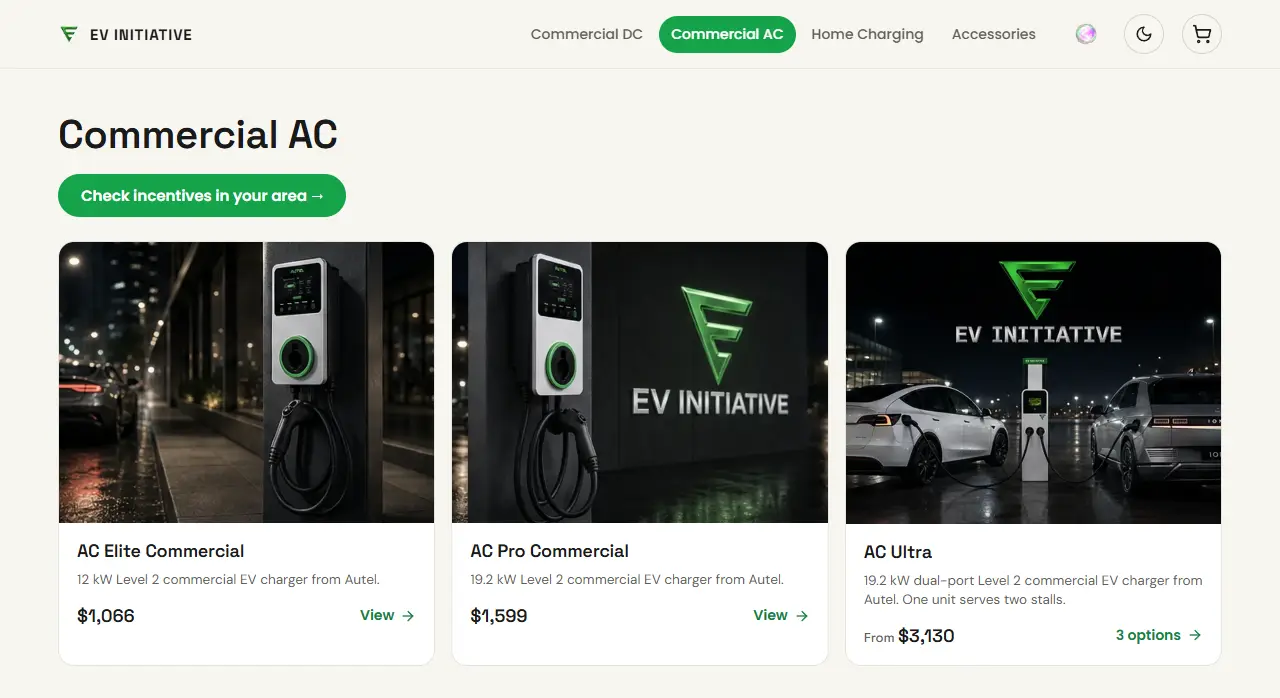
Order new chargers from evinitiative.shop. The hardware purchase guide covers lead times and arrival. Your installer or Sales Partner follows the charger installation guide. A charger appearing online is not launch approval.
Before inviting residents to charge
- Confirm the installed labels, connector numbers, site coordinates and agreed access type with the installer.
- Have the operator confirm guest pricing, any idle fee and its grace period, and the building’s join instructions.
- Wait for human launch approval. Then use a real resident account on the intended building access path to check a normal session.
- Share the app link and building join instructions with residents. Give residents who manage their own plug the residential guide; never share Admin or charger passwords.
5. Review activity across properties
Compare the locations you manage
- Open My Sites for chargers and availability, Earnings for site financial activity, or Reports for session history and energy.
- Use Locations to choose one location, all assigned locations, or a specific selection. My Sites and Earnings show the selection side by side in Compare locations; in Reports, open the Compare Locations tab.
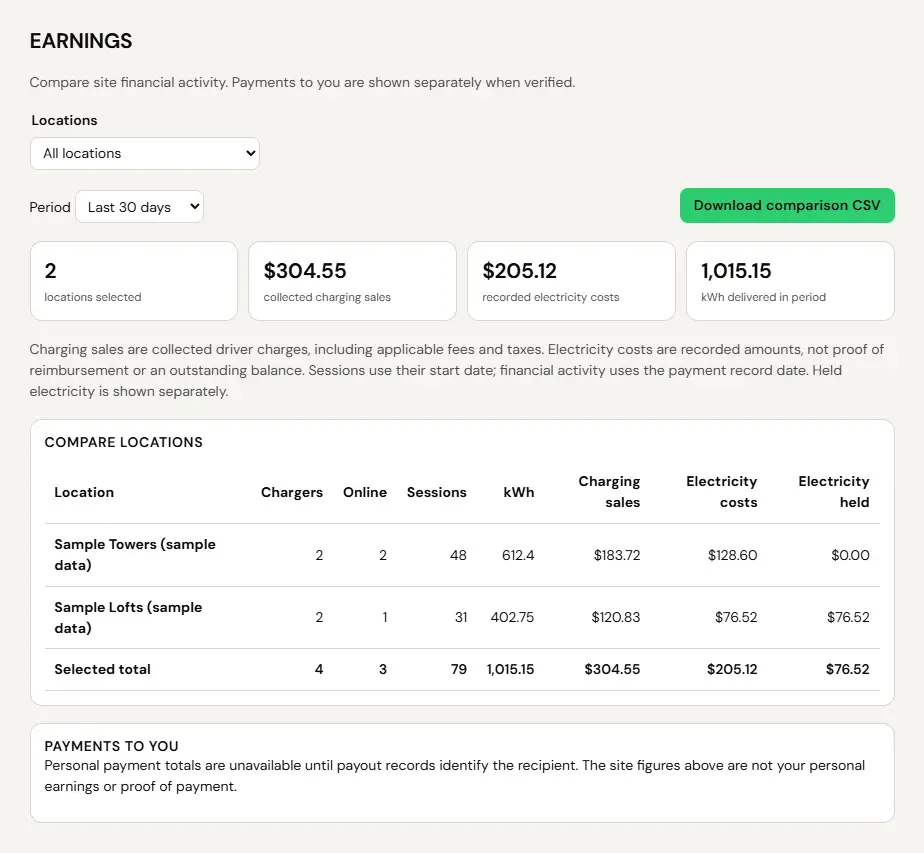
Earnings for all assigned locations, side by side. Charging sales, recorded electricity costs and held electricity are separate columns. Sample screen with test data. - In Reports, choose the date range and session status. Start with All statuses. If the period is empty, try a longer range before concluding that data is missing.
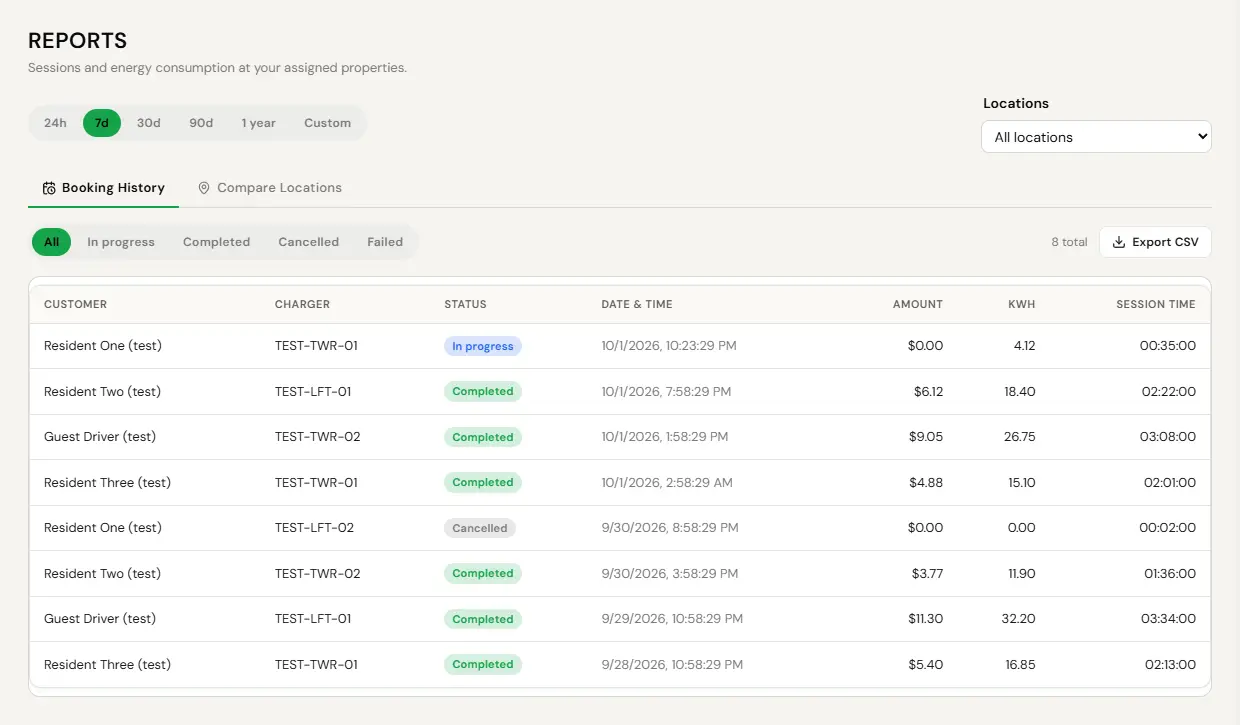
Reports with 7d, All locations and All statuses selected, and Export CSV on the right. Sample screen with test data. - Use Export CSV when you need session records. Keep the selected dates and location scope with the exported file.
The location bank account receives eligible electricity reimbursement, Site Share and legacy Revenue Share. Payments arrive in the location Stripe balance as each session settles. Bank deposits are scheduled weekly on Monday, subject to bank readiness and fund availability. The Site Host statement, below the bank card in Overview → Settings and in Overview → Payouts, lists each recorded transfer under Session transfers with its sessions, ledger currency, cash sent and conversion costs. A connected bank or recorded charging sales alone are not proof of payment.
Common questions
A site is missing
Ask the operator to check your site assignment and account email. Selecting “All locations” means all locations assigned to you.
Reports says no sessions match
Clear status filters, expand the date range and confirm the site selection. If a known session is still missing, send its identity and approximate time to support.
Stripe is connected but I have not been paid
Select the location, then check Session transfers in its Site Host statement, below the bank card in Overview → Settings and in Overview → Payouts, for recorded session transfers. If no bank was connected when a session settled, its electricity may be held until the bank is connected. Deposits reach the bank on the account payout day, weekly on Monday. If a recorded transfer has still not reached the bank after that, email payouts@evinitiative.com with the statement period, the amount and the transfer reference shown on the statement. The electricity-cost total is not an unpaid-balance calculation.
Send support@evinitiative.com the site name, charger identity, affected plug, time and time zone, and the error you see. Leave passwords, sign-in codes, card numbers and bank details out of the message. For damaged equipment or an electrical fault, stop using it and contact the responsible installer.