 EV INITIATIVE
EV Initiative / Fleet Admin · Fleet Operator
Your fleet. Ready for the road.
Confirm the fleet, bring in your drivers, and verify where they can charge and which payment arrangement applies. Test with a driver account before the first shift.
1. Confirm the fleet you manage
Open your assigned fleet
- Sign in to Admin using the account invited as a Fleet Operator.
- Open Overview → My fleet. If you manage more than one fleet, choose the intended one.
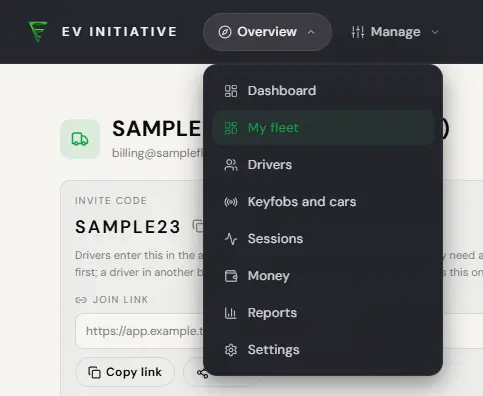
The Overview menu on a fleet admin account. Sample screen with test data. - Check its name, assigned chargers and settings. Ask the operator to resolve a missing fleet or incorrect charger assignment.
2. Bring your drivers onto the fleet
Choose the appropriate join method
- Open Drivers to review existing members and use the available add/invite or bulk-upload controls when appropriate.
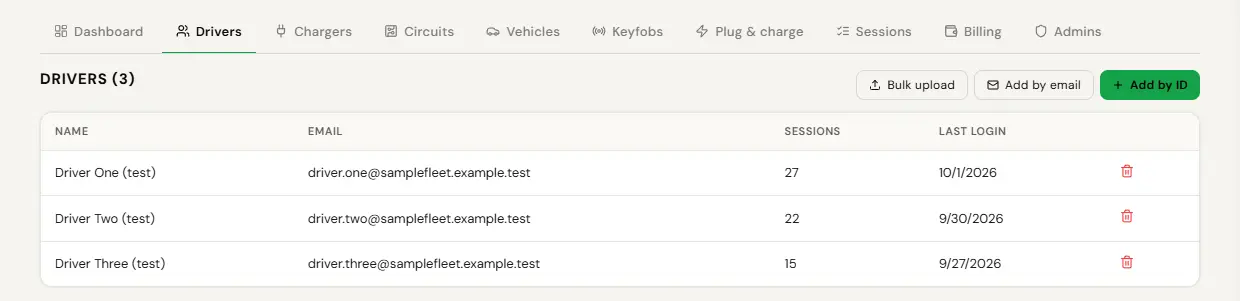
The Drivers tab, with Bulk upload, Add by email and Add by ID. Sample screen with test data. - For self-join, share the fleet’s Invite code, Join link or QR code from My fleet with intended drivers.
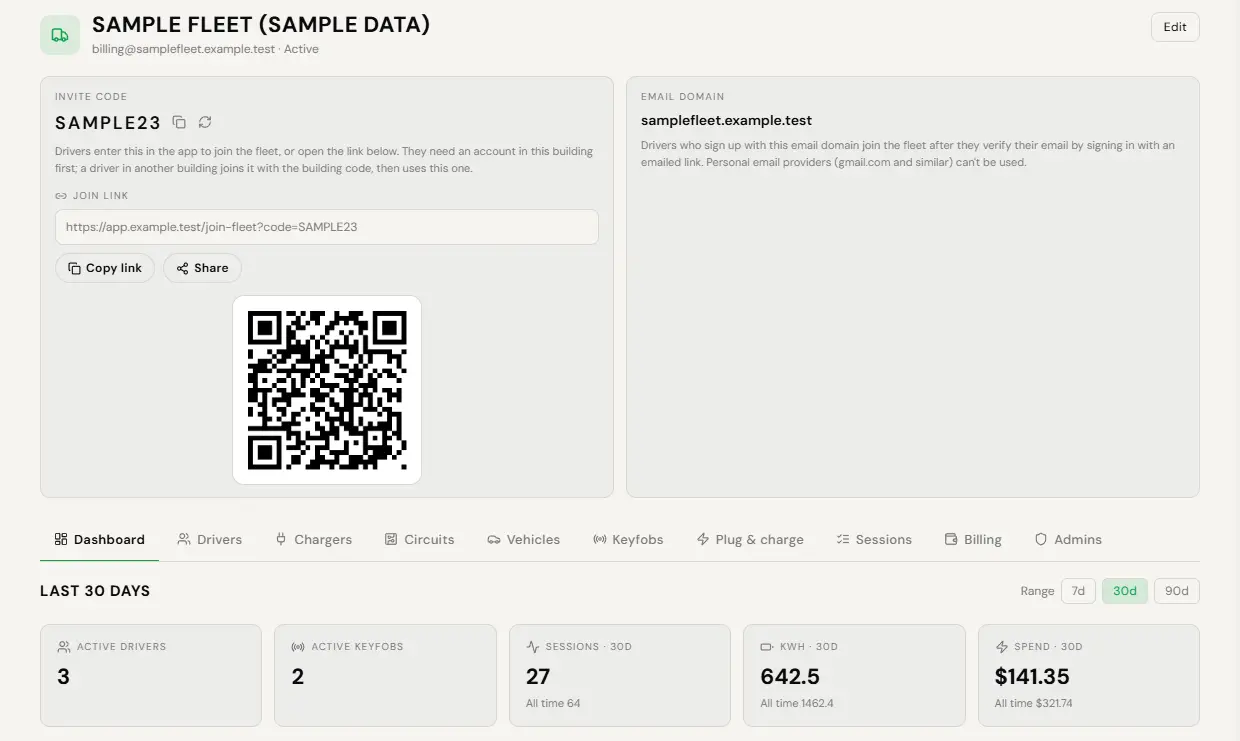
My fleet: the invite code, join link and QR code, the approved email domain, and the last 30 days. Sample screen with test data. - If using an approved company email domain, check its exact spelling. Drivers must verify their email; a personal email provider cannot be used as the company domain.
- Have each driver sign in to the driver app, complete the join flow and confirm that they appear in the correct fleet.
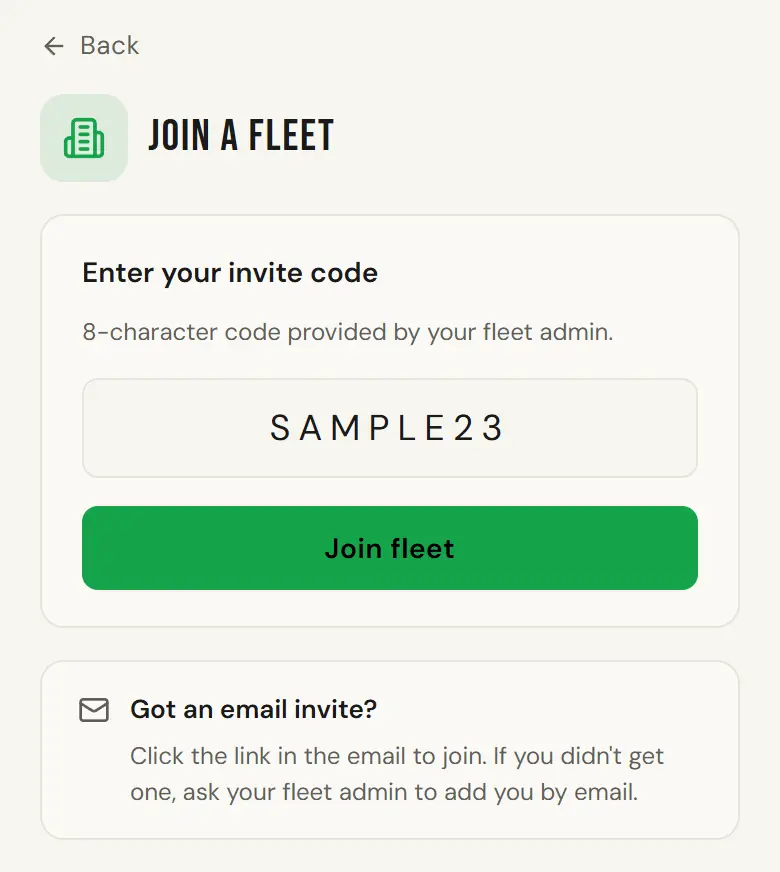
Join a fleet in the driver app, with the invite code typed in. Sample screen with test data.
A fleet driver is not automatically a fleet administrator. Ask the responsible operator to arrange another administrator’s access.
3. Check chargers, vehicles and credentials
Review Chargers in the fleet page. New sites can enter through Manage → Submit a Location, followed by Deployment commissioning. Follow the installer guide for hardware credentials and testing.
Match each credential to the right person or vehicle
- Open Keyfobs and cars and review the vehicles and keyfobs used by your fleet.
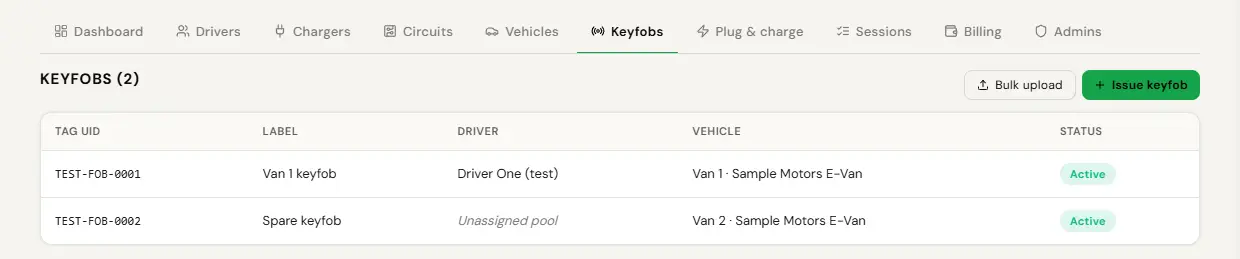
Keyfobs and cars opens the Keyfobs tab, with each keyfob’s driver, vehicle and status. Sample screen with test data. - Check driver/vehicle assignments and any plate or identifier details your process uses.
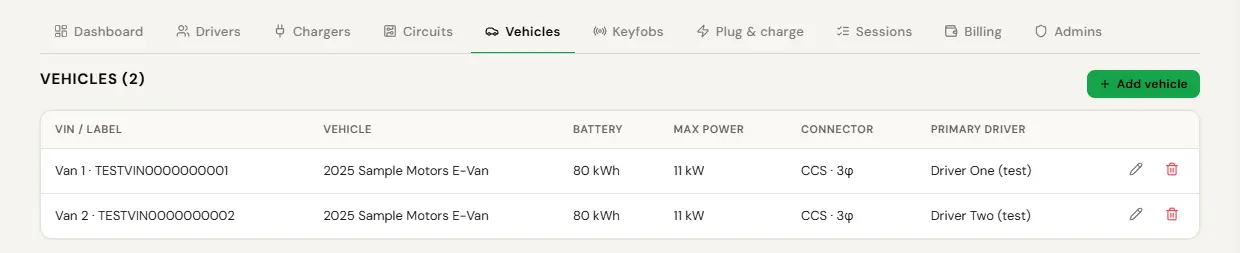
Vehicles have their own tab on the same page, with each vehicle’s primary driver. Sample screen with test data. - If issuing a keyfob is blocked by billing, follow the displayed prompt to the fleet’s Billing tab. Do not reuse an unrelated driver’s credential.
- Ask the operator about charger assignment or load-management controls that your account cannot change.
4. Confirm the payment arrangement
Open Money or the fleet’s Billing tab and read the displayed card, billing state and driver payment-method rule. Verify whether the fleet or the driver pays for the test you are about to run. A company join code does not prove that the company covers every public charging session.
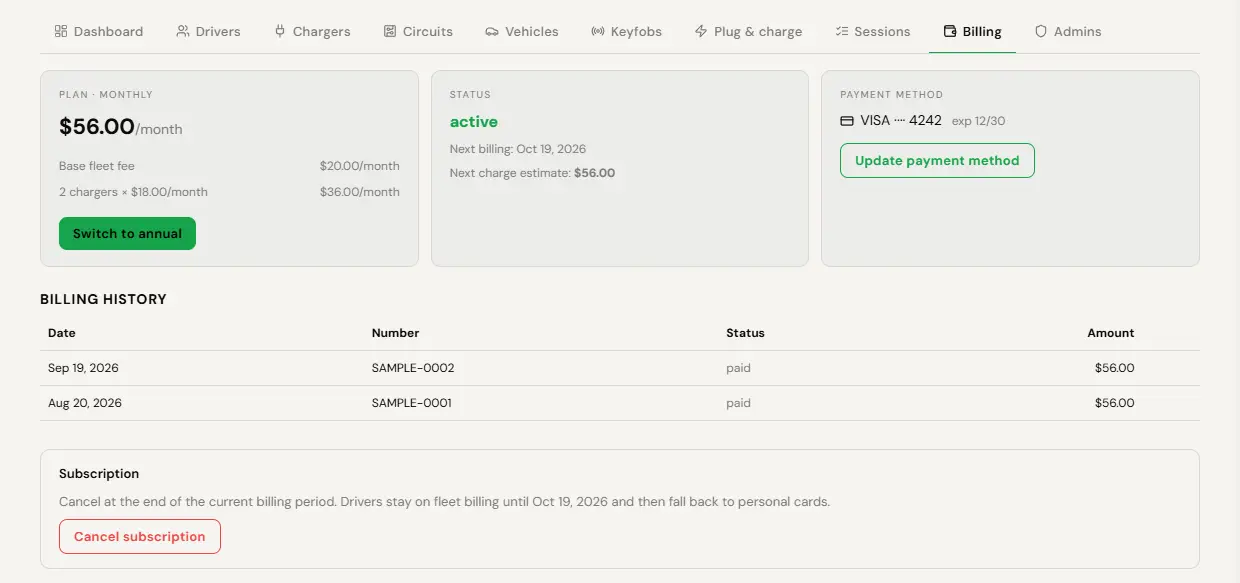
Resolve overdue billing or missing setup through the authorized billing contact. Load-management subscriptions and certain account-level changes require the responsible operator or tenant admin.
5. Test both driver modes
Use a real fleet driver account after launch
- Sign in to the driver app as an authorized member of this fleet.
- Switch to Fleet mode. Confirm the map shows only fleet locations that this driver is allowed to access.
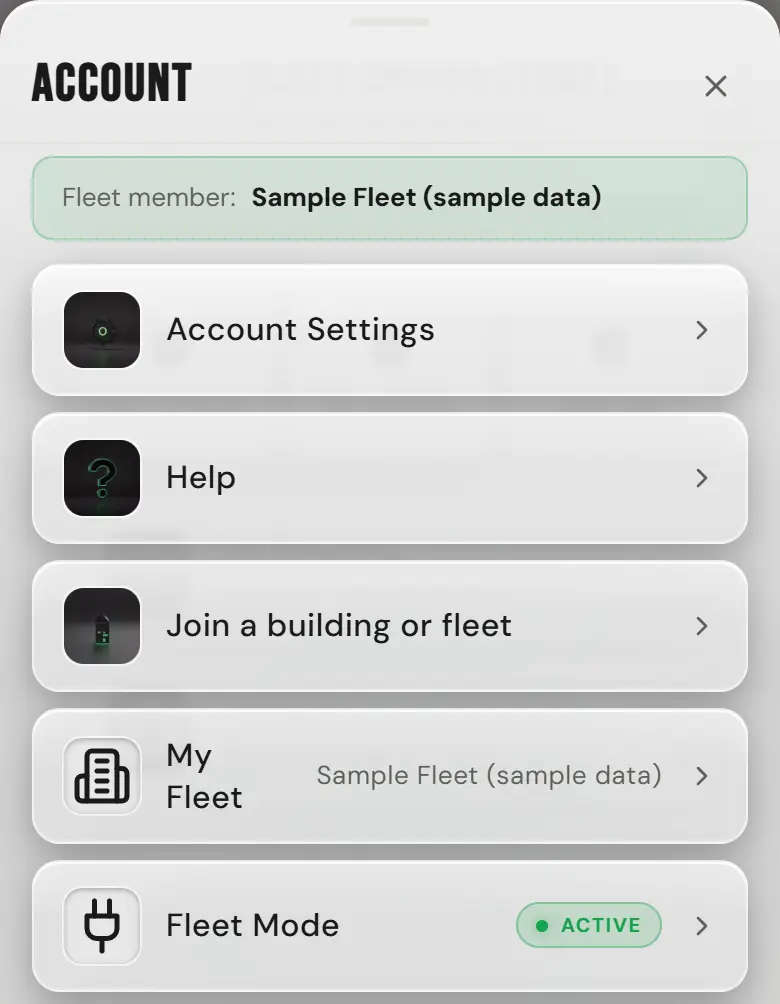
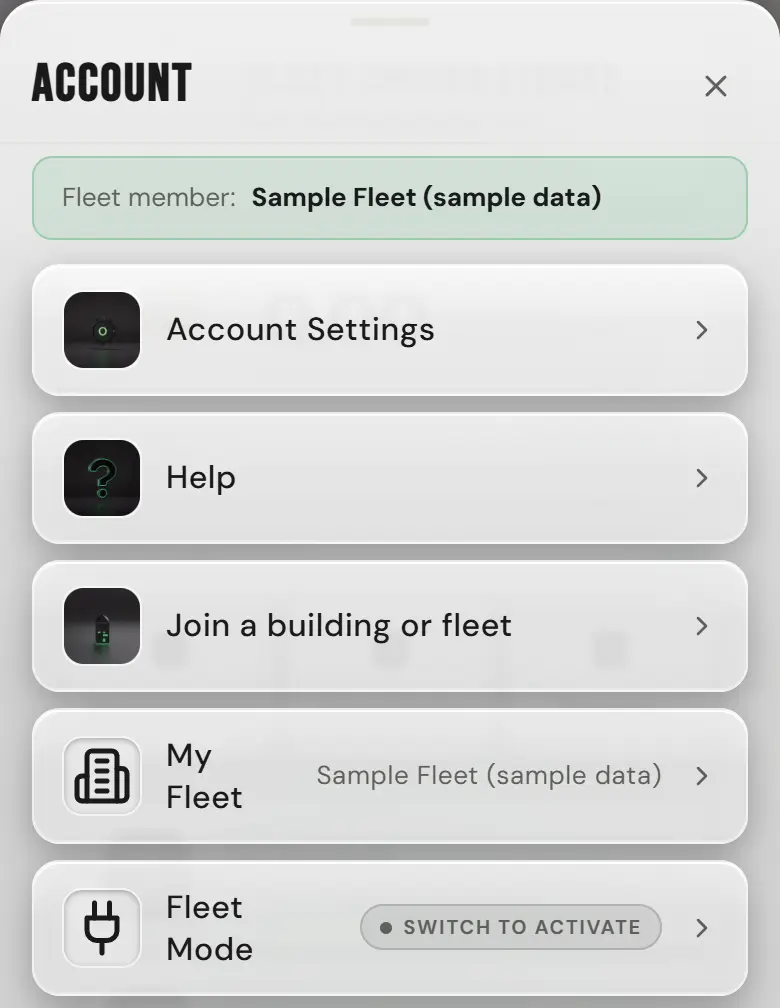
Switch modes with the Fleet Mode row in the Account sheet, opened from the Menu tab. It reads ACTIVE in Fleet mode, left, and SWITCH TO ACTIVATE in Public mode, right. Sample screen with test data. 
In Fleet mode the top bar shows a blue FLEET pill. In Public mode the same pill reads PUBLIC. Sample screen with test data. - Tap the Fleet Mode row again so it reads SWITCH TO ACTIVATE, which means Public mode. Confirm public locations are visible and selectable. Review the displayed payment method and price before charging.
- Return to the intended fleet mode and complete a session on an assigned plug. Verify it in Sessions or Reports with the expected driver and vehicle/credential details.
6. Review activity and handle issues
Use My fleet for the fleet summary, Sessions for individual charging activity, and Reports for date/location comparisons and exports within your assigned scope. Review inactive or departed drivers and involve the authorized operator when access needs changing.
A driver sees no fleet pins
Check their fleet membership, selected mode and assigned chargers. Public mode and Fleet mode intentionally show different location sets.
I cannot add another fleet administrator
Ask the responsible operator or tenant admin. Fleet-driver membership and fleet-administrator grants are separate.
Send support@evinitiative.com the site name, charger identity, affected plug, time and time zone, and the error you see. Leave passwords, sign-in codes, card numbers and bank details out of the message. For damaged equipment or an electrical fault, stop using it and contact the responsible installer.